You’ve spent hours meticulously picking parts and assembling your dream rig, but when you hit the power button, the silence is deafening—or worse, the fans spin for a second and then die. If your PC won’t post (Power-On Self-Test), you are likely feeling a mix of panic and frustration. Take a breath. Most “dead” systems are actually just suffering from minor seating issues or overlooked connections. This guide will walk you through the diagnostic steps to identify common assembly mistakes and get your system to that glorious BIOS screen.
1. Decoding Motherboard Debug LEDs
Most modern motherboards in 2026 feature a small cluster of LEDs labeled CPU, DRAM, VGA, and BOOT. These are your first line of defense in a no-post troubleshooting scenario.
- Red (CPU): Usually indicates a power delivery issue or a physical seating problem with the processor.
- Yellow (DRAM): Your memory isn’t communicating. This is often caused by using the wrong slots or a single unseated stick.
- White (VGA): The system can’t find the GPU. Ensure your 12VHPWR cable is clicked in.
- Green (BOOT): Your hardware is fine, but it can’t find a drive with an Operating System.
2. Power Supply Pitfalls: The “Click” Test
In the era of high-TDP components, simply “plugging it in” isn’t enough. The most common reason a PC won’t post today involves the new power standards.
The 12VHPWR and ATX 3.1 Standards
The 16-pin connectors on modern GPUs are notoriously sensitive. If the connector isn’t pushed in until you hear an audible click, the sense pins won’t trigger, and the card will refuse to draw power. Check for any gap between the cable head and the GPU socket; even a 1mm gap can prevent a successful boot.
EPS vs. PCIe: Don’t Cross the Streams
It sounds basic, but the 8-pin CPU (EPS) cable and the 8-pin PCIe cable look remarkably similar. Plugging a PCIe cable into the motherboard’s CPU header is a critical mistake that can trigger the PSU’s short-circuit protection instantly. Always double-check the labels printed on the cable headers.
3. The “Seating” Checklist: CPU and Memory
If your motherboard is throwing a Red or Yellow light, it’s time to go back to basics.
- The Memory Loop: DDR5 and DDR6 platforms are finicky about training. If you are using two sticks on a four-slot board, they must be in slots 2 and 4. If the system boot-loops, try starting with just a single stick in slot 2 to rule out a faulty module.
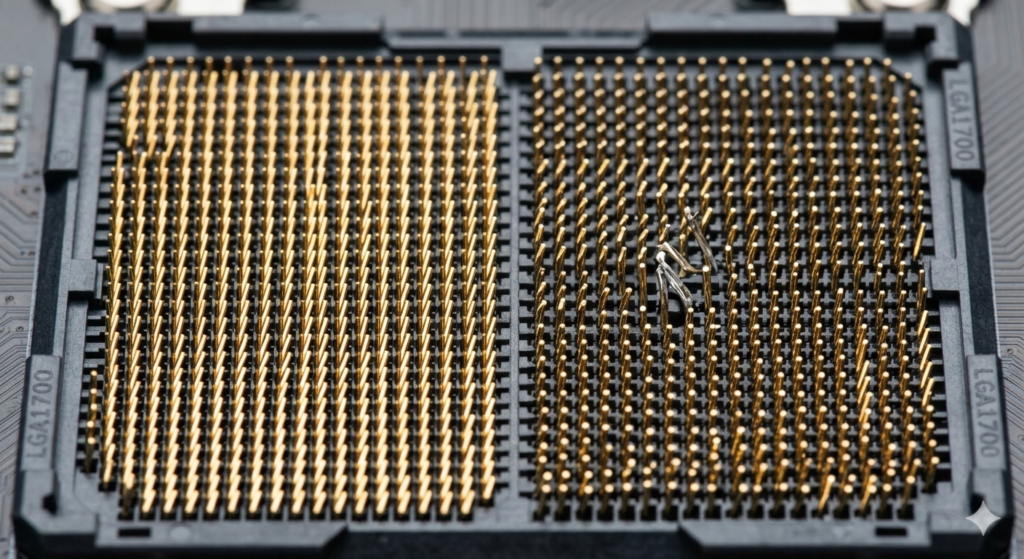
- Socket Inspection: If you suspect a CPU issue, remove the cooler and chip. Use a flashlight to check for bent pins in the socket or thermal paste that may have leaked onto the contact pads.
4. Mechanical Shorts and Stand-off Sabotage
Is your motherboard touching the metal of your case? If you missed a “stand-off” (the small brass spacers), your motherboard will short out the moment it receives power.
Expert Warning: If you see a spark or smell ozone, flip the PSU switch immediately. Most high-quality power supplies, like those followingIntel’s ATX 3.1 Design Guide, have Over-Current Protection (OCP) to prevent permanent damage, but you shouldn’t test your luck.
5. The “CircuitSeek” Failure Matrix
Use this logic flow to isolate the culprit before you start RMA-ing parts:
| Symptom | Primary Suspect | Action |
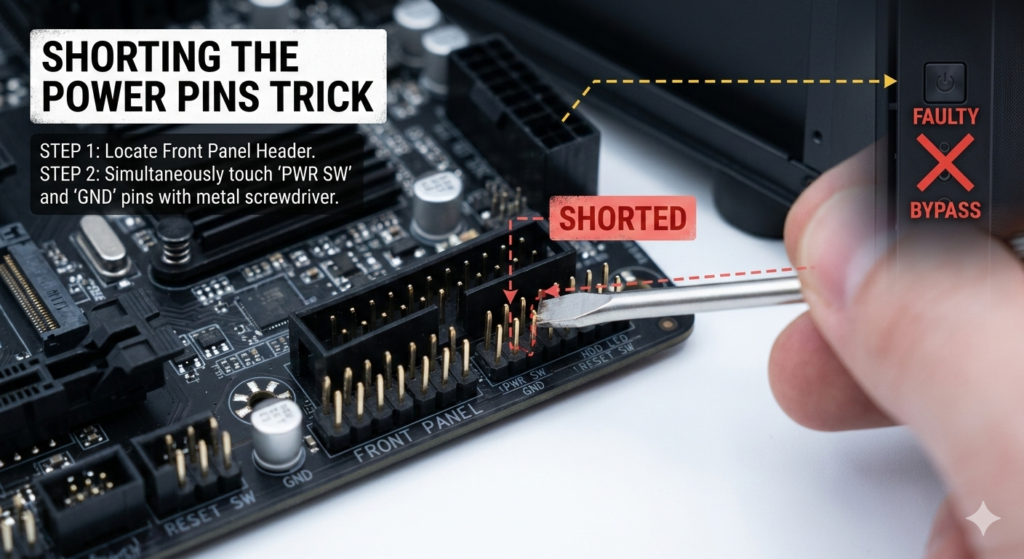
| No lights, no fans | PSU / Power Button | Check the PSU “I/O” switch and front panel headers. |
| Fans spin, then stop | Short Circuit | Loosen CPU cooler pressure or check stand-offs. |
| Fans spin, Red LED | CPU Power | Reseat the 8-pin EPS cable at both ends. |
| Fans spin, White LED | GPU Seating | Reseat the GPU and check the monitor input source. |
6. FAQ: Emergency Triage
Q: My PC turns on, but there’s no display. Is my GPU dead? A: Not necessarily. If you have an integrated GPU on your CPU, try plugging the HDMI/DisplayPort directly into the motherboard. If it works, the issue is your dedicated GPU seating or power.
Q: Should I reset the CMOS? A: Yes! Removing the silver coin battery for 30 seconds clears the BIOS memory. If you’ve accidentally messed up a frequency setting, this is the “magic button” that fixes 50% of post-assembly issues.
Final Thoughts
A no-post error is a rite of passage for every builder. It’s rarely a sign of “dead” hardware and usually a sign of a cable that needs one more firm push. Follow the Failure Matrix, watch those LEDs, and you’ll be installing your OS in no time.