So, you’ve finally pulled the trigger on a pile of high-end components. Whether you’re staring at a brand-new RTX 50-series monster or a sleek productivity workstation, the transition from “boxes on the floor” to “glowing rig” is the most nerve-wracking part of the journey. This PC assembly guide isn’t just a manual; it’s a tactical roadmap designed to help you navigate the 2026 hardware landscape—avoiding bent pins, fried circuits, and the dreaded “black screen” on your first boot.
1. The Pre-Flight Check: ESD Safety and Tools
Before you touch a single PCB, we need to talk about the “silent killer”: Electrostatic Discharge (ESD). While modern components have better built-in protection than the hardware of a decade ago, a stray spark can still cause intermittent stability issues that are a nightmare to diagnose later.
- The Setup: Clear a non-carpeted area. A wooden table is your best friend.
- The Gear: You don’t need a 50-piece toolkit. A long-neck magnetic Phillips #2 screwdriver, some Velcro ties, and a pair of anti-static tweezers will handle 90% of the work.
Pro Tip: “Grounding” yourself is simple. Occasionally touch the metal chassis of your (plugged-in but turned-off) power supply to discharge any static buildup.
2. Installing the “Brain”: CPU and RAM Population
The motherboard is the heart of your system, and installing the processor is the “Point of No Return.” In 2026, socket densities have increased, making those gold pins more fragile than ever.
Handling the Socket without the Sweat
When you lift that tension arm, do not—under any circumstances—touch the socket pins. Align the gold triangle on your CPU with the triangle on the socket. Let the chip “drop” into place via gravity. If you have to press down, something is wrong.
The RAM Priority Rule
Most modern boards have four DIMM slots, but they aren’t created equal. For the best signal integrity and to enable XMP/EXPO profiles without crashing, use slots 2 and 4 (counting away from the CPU). This isn’t just a suggestion; it’s a requirement for high-speed DDR5/DDR6 stability.
3. Storage and Thermal Paste Application
With PCIe 6.0 NVMe drives becoming the standard, heat is your primary enemy. Most 2026 motherboards come with “tool-less” M.2 heatsinks. Ensure you peel the plastic film off the thermal pad before sandwiching your drive, or you’ll see thermal throttling within minutes.
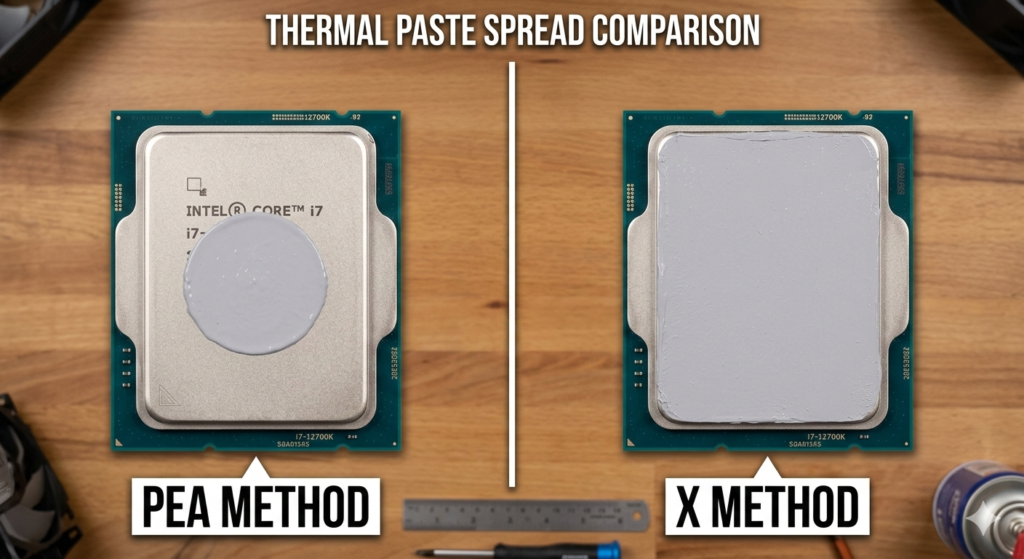
The “X” Method vs. The “Pea”
For the massive integrated heat spreaders (IHS) on modern multi-core chips, the old “pea-sized” drop in the center isn’t enough. We recommend a thin ‘X’ pattern to ensure total corner-to-corner coverage. According to Intel’s Technical Documentation, proper contact can drop load temperatures by as much as $5^{\circ}C$ to $8^{\circ}C$.
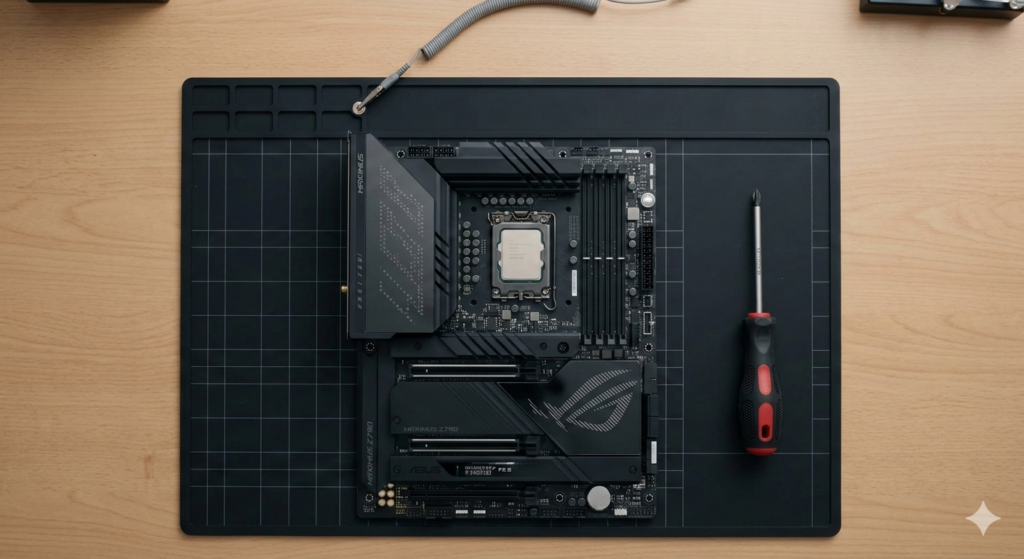
4. The “Post-Outside-The-Box” Strategy
One of the biggest amateur mistakes is screwing everything into the case before testing. Save yourself the headache.
Place your motherboard on its own cardboard box. Connect the CPU, RAM, and GPU. Plug in the 24-pin and CPU power cables. Short the “Power SW” pins with a screwdriver to see if it posts. If the Motherboard Debug LEDs stay white (VGA) or green (Boot), you’re golden. If they stay red (CPU), you can fix it now without disassembling the entire chassis.
| LED Color | Meaning | Likely Fix |
| Red | CPU Error | Check EPS power cable or seating |
| Yellow | DRAM Error | Reseat RAM or try one stick |
| White | VGA Error | Check GPU seating or 12VHPWR cable |
| Green | Boot Success | You are ready to install the OS! |
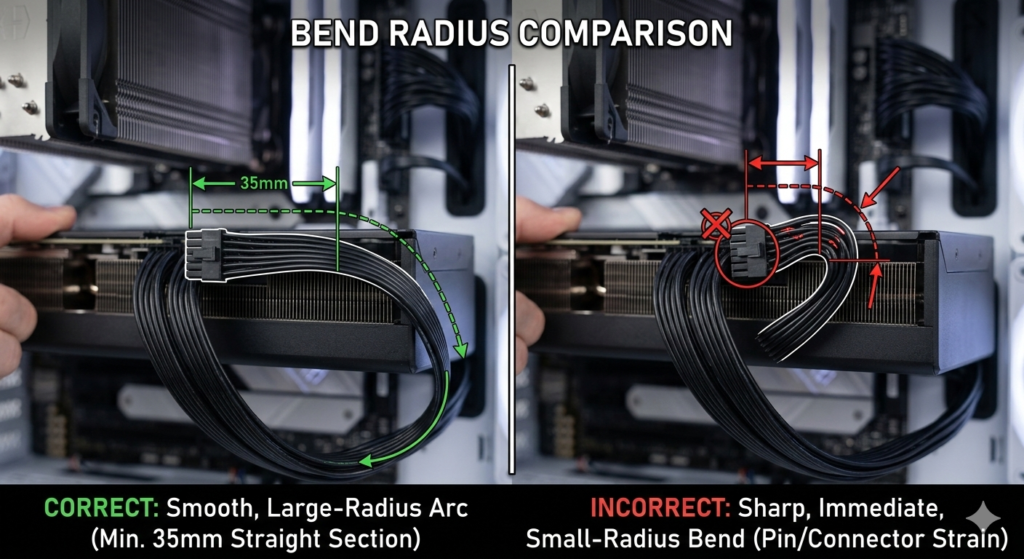
5. Case Integration and the 12VHPWR Connection
Modern high-TDP GPUs use the 12VHPWR (or its successors). These connectors are notorious for thermal issues if not seated perfectly.
- The “Click”: You must hear an audible click when plugging in the GPU power.
- No Sharp Bends: Ensure there is at least 35mm of straight cable before any bend occurs to prevent terminal strain.
- Cable Management: Use the back-side of the case. Airflow isn’t just about “neatness”—it’s about ensuring your intake fans have a clear path to the GPU’s cooling fins.
6. FAQ: Common Assembly Anxiety
Q: My motherboard flexes when I install RAM. Is it going to snap? A: Motherboards are surprisingly resilient, but always support the edge of the board with your fingers if you’re installing RAM outside of the case.
Q: I forgot the I/O shield. Do I really need to take it apart? A: In 2026, most mid-to-high-end boards have pre-installed shields. If yours doesn’t, yes—take it apart. It’s essential for EMI shielding and proper airflow.
Final Thoughts
Building a PC is a rite of passage. If you follow this PC assembly guide, take your time, and respect the “Post-Outside-The-Box” rule, you’ll be in the BIOS within the hour.