You already know what a bad home office feels like.
It’s 9:17 a.m. You’re in a video call. Your back started hurting twenty minutes ago, but you’re too deep in the meeting to shift positions. The natural light that looked perfect at 8 a.m. is now a glare on your screen. Your coffee mug is balanced on top of a notebook because there’s nowhere else to put it. And somewhere under the pile of cables is your mouse — or was it on the other side of the keyboard?
This is how most people are working from home right now. Not because they’re lazy or disorganized, but because nobody actually told them how to set up a home office that works. Most guides jump straight to product lists. “Buy this monitor. Buy this chair.” But they skip the part where you understand why certain things matter — and what order to do them in.
This guide is different. We’ll walk through the entire home office setup process, from figuring out your space to choosing the right gear for your actual budget. Whether you’re starting from scratch or fixing a setup that’s slowly making you miserable, there’s something here for you.
Key Takeaways
- Your desk and chair posture setup should come before any equipment purchase — getting this wrong makes expensive gear pointless
- The single highest-ROI upgrade for most people is a monitor at eye level; it costs less than $50 to fix and reduces neck strain immediately
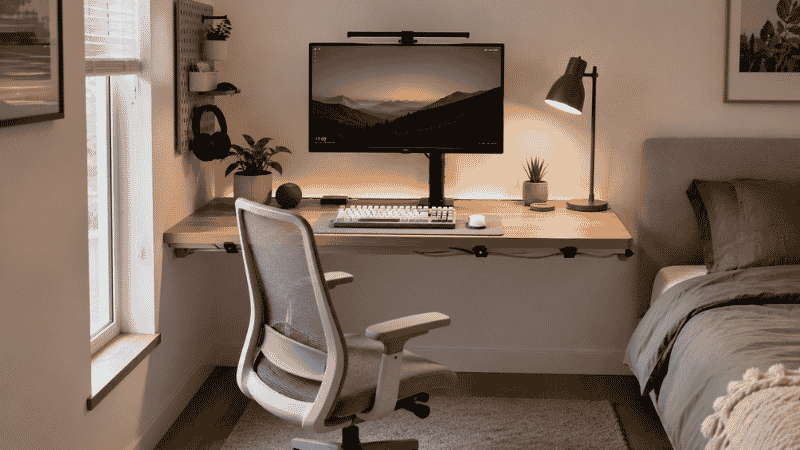
- A functional home office setup doesn’t require a dedicated room — even a 4-foot corner of a bedroom can work well with the right layout
- Research by the CDC found that ergonomic workplace improvements reduce musculoskeletal discomfort by up to 75% — the same principles apply at home
- Most people overbuy in three categories (chairs, monitors, webcams) and underbuy in two (lighting, cable management)
Before You Buy Anything: Get Your Space Right First
Here’s a mistake almost everyone makes: they buy the chair, buy the monitor, and then figure out where everything goes. Then they realize the monitor is too close to the window, the chair doesn’t fit under the desk, and the cable from the laptop can’t reach the outlet.
Start with space. Even if it’s a corner of your bedroom.
The minimum you need is a surface roughly 48 inches wide and 24 inches deep. That’s enough room for a monitor, a laptop or keyboard, and a small amount of desk space on either side. Anything smaller and you’ll constantly feel cramped, which quietly drains your focus all day.
Pick your spot based on these three factors, in order:
Lighting source first. You want natural light to your side — not directly in front of or behind your screen. A window behind you creates glare on your monitor during video calls. A window in front of you means you’ll be squinting all morning.
Wall or visual boundary second. Working with your back to an open room is surprisingly distracting. Even a bookshelf, a curtain, or a simple room divider helps your brain categorize the space as “work.”
Outlet proximity third. This sounds obvious, but cable length is a real constraint. Know where your power strip will go before you commit to a desk location.
Once your spot is chosen, then start thinking about furniture and gear.
The Right Desk: What Actually Matters (And What Doesn’t)
The desk is where most people either overspend or underspend in ways that backfire.
Overspending looks like buying a beautiful $800 standing desk before you’ve ever tried standing to work — and then discovering you hate it three weeks later. Underspending looks like a $60 folding table with no surface stability, where your monitor wobbles every time you type.
For most people working a standard office job from home, you need a desk that is:
- At least 47 inches wide. This gives you room for a monitor, a laptop or keyboard, and something on the side without feeling like you’re playing Tetris every morning.
- Stable at the surface. Shake it with both hands. If it wobbles noticeably, typing will transmit vibration to your screen all day.
- The right height for your arms. Sitting in your chair, your forearms should rest on the desk at roughly a 90-degree angle with your shoulders relaxed. For most adults, this is 28–30 inches.
If you’re working in a small space, an L-shaped desk isn’t always the answer. Corner desks eat up a lot of space, and the corner itself is often wasted. A single straight desk with a monitor arm or riser often gives you more usable surface area in a smaller footprint.
Standing desks: If you’re curious, start with a standing desk converter — it sits on top of your existing desk and lets you alternate positions. They start around $80. Try it for a month before investing in a full motorized desk.
Your Chair Is More Important Than Your Desk
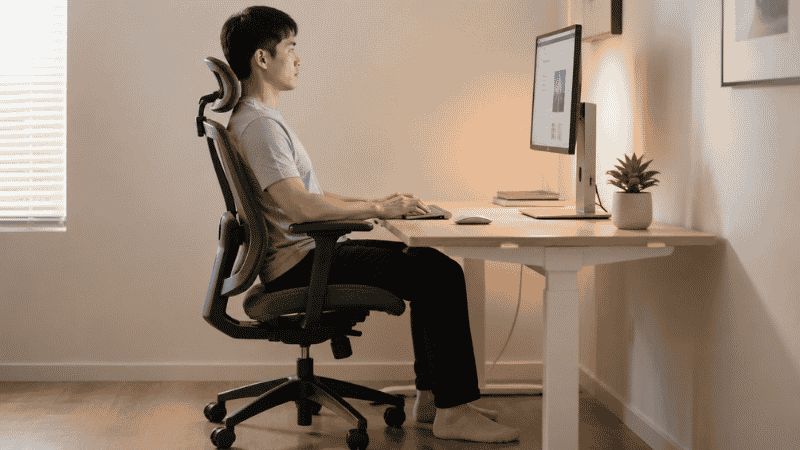
This is the one thing most home office guides get backwards.
People spend $600 on a desk and $80 on a chair. Then they wonder why their back hurts. The desk is furniture. The chair is where your body spends eight hours. That ratio should flip.
You don’t need a $1,200 Herman Miller. But you do need a chair with three things:
Lumbar support that actually contacts your lower back. Not decorative lumbar padding. Support that sits at the curve of your spine when you’re sitting naturally. Many cheap chairs have lumbar support positioned too low, which means it’s actually pushing against your tailbone, not your lumbar region.
Seat height adjustment. Your feet should sit flat on the floor. Your thighs should be roughly parallel to the ground. If you’re short and your feet are dangling, add a footrest (they’re $20–30 and genuinely help). If you’re tall and your knees are above your hips, you need a chair with a higher adjustment range.
Armrests at the right height. Your elbows should rest on the armrests with your shoulders relaxed — not hunched up, not drooping. Most office chairs have adjustable armrests. Use them.
Budget guidance:
- Under $150: Functional but expect to replace it within 2–3 years. Fine if you’re just starting out.
- $150–$300: This is the sweet spot for most people. Chairs like the HON Ignition, Staples Hyken, or Autonomous ErgoChair Pro offer real ergonomic support without the luxury price tag.
- $300–$600: Meaningful step up in build quality and adjustment range. Consider this if you’re sitting 8+ hours a day.
- $600+: For people with existing back issues or extreme sitting hours. Worth it for some, overkill for most.
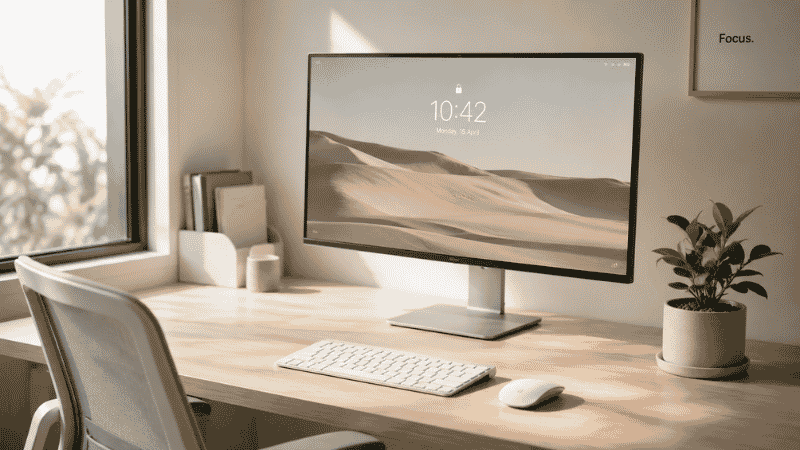
Monitor Setup: The Upgrade That Costs Almost Nothing to Get Right
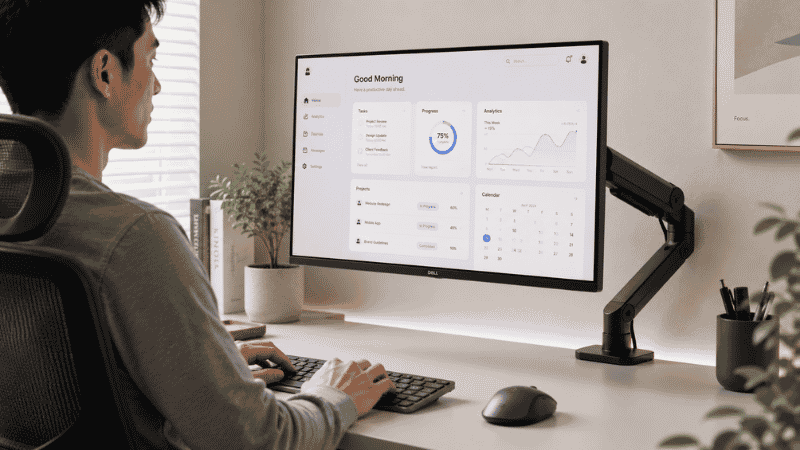
A monitor at the wrong height causes neck strain. A monitor that’s too close causes eye strain. Both of these things happen gradually, which means most people don’t connect their 3 p.m. headaches to a screen that’s two inches too low.
The correct monitor position:
- Eye level at the top third of the screen, not the top edge. When you look straight ahead, you should see the top portion of whatever you’re viewing.
- An arm’s length away from your face — roughly 20–28 inches depending on screen size.
- Slightly tilted back (10–20 degrees) so the bottom of the screen is a touch closer to you than the top.
If you have a laptop as your main computer, get it off the desk surface. A laptop stand costs $20–40 and immediately puts the screen at a better height. Pair it with an external keyboard and mouse, and you’ve essentially created a desktop workstation for under $100.
If you’re buying a monitor, 27 inches at 1440p resolution is the current sweet spot for home office work. It’s large enough to have two windows open side by side, sharp enough to read small text comfortably, and prices have dropped significantly — solid options start around $200–$280.
Lighting: The Most Underrated Part of Every Home Office Setup
Bad lighting doesn’t just look bad on video calls. It causes eye strain, makes you feel tired faster, and subtly affects your mood all day.
The goal is to have your workspace evenly lit without harsh contrast between your screen and the surrounding area. When your screen is significantly brighter than everything around it, your eyes constantly readjust as you shift your gaze. Over hours, this is genuinely exhausting.
Three-point fix that works for most setups:
Primary light should come from beside you, not above or behind your screen. A simple desk lamp with a daylight bulb (5000K–6500K color temperature) positioned to the left or right of your monitor eliminates most screen glare.
Ambient fill behind your monitor softens the contrast. Even a cheap LED bias light strip stuck to the back of your monitor makes a noticeable difference. They run $15–25 and take ten minutes to set up.
Natural light managed with intention. Use a sheer curtain or adjustable blinds to diffuse direct sunlight rather than block it entirely. Flat, diffused daylight is ideal. Direct sunbeams on your desk are not.
If you’re on video calls frequently, add a small ring light or desk-mounted key light in front of you. You don’t need the $200 streamer version. A $35–50 LED key light does the job.
The Essential Gear List (By Budget Tier)
This is where most guides start. We saved it for here on purpose — because now you have the context to actually use it.
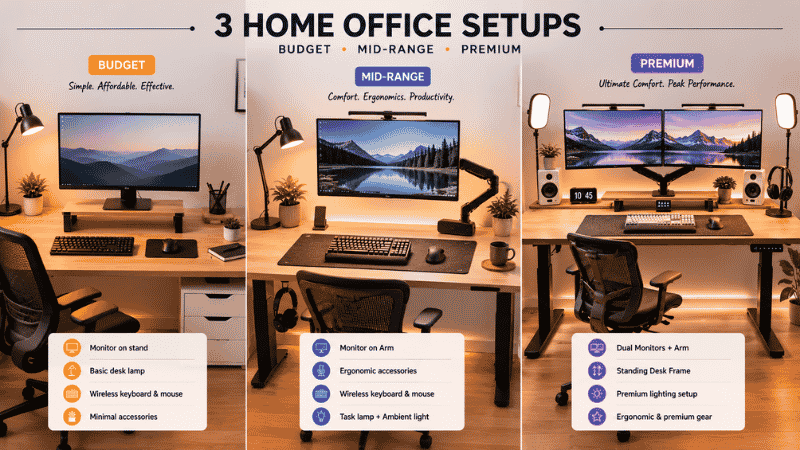
Tier 1: The Functional Foundation (~$200–$400 total)
You’re starting from zero or fixing a painful situation on a tight budget. This gets you 80% of the way there.
- Chair: HON Ignition 2.0 or Staples Hyken (~$150–$200)
- Monitor riser or laptop stand: Any adjustable riser, $20–40
- External keyboard: Logitech K380 wireless, ~$40
- External mouse: Logitech M510 or MX Anywhere 3, $30–$50
- Desk lamp: BenQ ScreenBar or any 5000K desk lamp, $30–$80
- Cable clips or velcro ties: $8–$12
Tier 2: The Comfortable Daily Driver (~$600–$1,000 total)
You’re working from home full-time and want a setup that doesn’t feel like a compromise.
- Chair: Autonomous ErgoChair Pro or Branch Ergonomic Chair (~$300–$350)
- 27″ 1440p monitor: LG 27GP850-B or Dell S2722DGM (~$230–$280)
- Monitor arm: Ergotron LX (~$40–$60 on sale)
- Keyboard: Logitech MX Keys (~$100) or Keychron K2 for a mechanical option (~$90)
- Mouse: Logitech MX Master 3S (~$80–$100)
- Webcam: Logitech C920x or Anker PowerConf C200 (~$60–$80)
- LED bias lighting: Govee or Elgato Bias Light strip (~$20–$30)
Tier 3: The Optimized Setup (~$1,500–$2,500 total)
You’re fully remote, treat your workspace seriously, and want it to feel effortlessly good.
- Chair: Steelcase Leap V2 or Herman Miller Aeron (refurbished options at $400–$700)
- Dual 27″ monitors or single ultrawide: Based on your workflow
- Standing desk: Flexispot E7 or Uplift V2 (~$500–$700)
- Thunderbolt/USB-C dock: CalDigit TS3 Plus or OWC Thunderbolt Hub (~$100–$200)
- USB condenser mic: Blue Yeti or Rode NT-USB Mini (~$80–$120)
- Good lighting: Elgato Key Light Air (~$130)
What To Do If You Only Have 10 Minutes Right Now
You don’t have to overhaul everything today. If you have ten minutes right now and want to feel an immediate difference:
- Raise your screen. Stack a ream of paper, a box, your laptop stand — anything to get your eye level to the top third of the screen.
- Move your chair height so your feet are flat on the floor.
- Clear everything off your desk that you haven’t touched in the last 48 hours. Start with a clear surface.
That’s it. Those three changes take ten minutes and will make your next two hours noticeably more comfortable.
Common Setup Mistakes (And How to Avoid Them)
“I bought the chair but my back still hurts.” Seat height and lumbar position both need adjustment. Most chairs ship with the seat too low and the lumbar support not quite touching your spine. Spend five minutes adjusting both.
“My monitor is too far/too close and I can’t fix it.” A monitor arm ($40–$60) solves this completely. It lets you position the screen exactly where you need it and swing it out of the way when you need desk space.
“I set up a standing desk but I hate standing.” You shouldn’t stand all day — that’s as bad as sitting all day. The goal is to alternate. Stand for 20–30 minutes, sit for the rest of the hour. An anti-fatigue mat makes a real difference if you’re standing.
“My setup looks fine but I still feel scattered and unproductive.” This is almost always a lighting and organization issue. A cluttered surface and dim or flickering light both quietly drain mental energy. Fix the light and clear the desk before buying anything new.
FAQs
What’s the minimum budget for a proper home office setup? Around $200–$250 gets you a functional ergonomic setup if you already have a computer. Prioritize chair height adjustment and screen position before spending anything on peripherals.
Do I need a dedicated room for a home office? No. A well-organized corner of any room works. The key is visual separation from “relax mode” spaces and control over lighting. Many people have excellent setups in 30–40 square feet.
Is a standing desk worth it for home office use? For most people, a standing desk converter is a better starting point than a full motorized desk. Try the behavior change first ($80–$120), then invest in the furniture if you know you’ll use it.
How far should my monitor be from my face? 20–28 inches, depending on screen size. A 24″ monitor is comfortable at 20–24 inches. A 27″ or larger is better at 24–30 inches. If you’re squinting, you’re too far. If you find yourself leaning back, you’re too close.
Can I use my TV as a monitor for home office work? Technically yes, but it’s rarely ideal. TVs are optimized for viewing from 6–10 feet away, have high input lag for text-heavy work, and usually sit too low or too high without a proper mount. A dedicated monitor almost always produces a better experience for office tasks.
What should I upgrade first if I have a limited budget? Chair and screen height — in that order. Both affect physical comfort directly and have the highest impact per dollar spent.
How do I reduce eye strain from working on screens all day? Three evidence-based adjustments: match your screen brightness to your ambient room light, use night mode or warmer color temperature in the evenings (reduces blue light exposure), and follow the 20-20-20 rule — every 20 minutes, look at something 20 feet away for 20 seconds. The American Academy of Ophthalmology recommends this as a primary intervention for digital eye strain.
Build It in Layers, Not All at Once
The best home office setups weren’t built in a day. They evolved. Someone started with a better chair, then added a monitor arm, then fixed the lighting, then eventually upgraded the keyboard.
The point isn’t to have everything perfect before you start. The point is to stop working in a space that’s quietly hurting your body and draining your focus — and to start making small, intentional improvements that compound over time.
Start with what’s causing you the most friction right now. Fix that. Then move to the next thing.
If your back hurts, start with the chair. If your neck hurts, start with the screen height. If your eyes are tired, start with the lighting. The right first upgrade isn’t the most expensive one — it’s the one that solves your biggest problem today.
Related Articles on CircuitSeek
- Best Monitors for Home Office in 2026 →
- Best Ergonomic Chairs Under $300 →
- How to Set Up Dual Monitors: Step-by-Step Guide →
- Best Desk Lamps for Eye Strain →
- Home Office Ideas for Small Spaces →
- Best Wireless Keyboards for Home Office 2026 →
References
- Centers for Disease Control and Prevention. Ergonomic Interventions for Prevention of Musculoskeletal Disorders. NIOSH Publication. https://www.cdc.gov/niosh/topics/ergonomics/
- American Academy of Ophthalmology. Computers, Digital Devices and Eye Strain. https://www.aao.org/eye-health/tips-prevention/computer-usage
- Harvard Health Publishing. The truth about standing desks. Harvard Medical School. https://www.health.harvard.edu/pain/the-truth-about-standing-desks